Thursday, September 29, 2016

Italian Stuffed Steak Rolls

Do you collect cookbooks? Some of my favorite thrift store finds are vintage cookbooks! I like those spiral bound books that were used by churches and ladies organizations for fundraising. They always have the best old fashioned recipes!

The cookbooks from the '70's are fascinating because many of the ingredients used were brand name convenience foods. I grew up in the '70's (hello!! check out my profile picture!) and I'm no stranger to the convenience foods of the disco era, but I'm not sure what some of them are.

This recipe for Italian Stuffed Steak Rolls (aka Braciole) is from one of those old spiral bound cookbooks. My husband Mike say's his mom used to make a similar type of beef roll when he was growing up. He was born and raised in Upstate NY, so you KNOW they were good! His mother passed away years ago, so I've asked him to check with his sisters to see if they have her recipe. Meanwhile, I made this today. It took a little effort, but it wasn't hard. Plus, it was a nice change from a ground beef sauce.


                                     Italian Stuffed Steak Rolls

You'll use round steak for this recipe. You can usually find this already sliced at the store:

   Italian Stuffed Steak Rolls

Pound the slices a little thinner using your mallet. I put the slices (one at a time) between plastic wrap and give them a gentle beating until they expand and thin out a bit. It's not a huge difference, but I think it makes rolling them easier.

Round Steak Slices

There's my mallet! With part of the price tag still on it! Yes...I do wash it, but I hand wash so the sticker has lingered (that's right - I don't even own a dishwasher!). Plus, there's always a layer of plastic between the meat and the mallet, so I think everything is ok here.

You can see below that the meat is a little thinner...

Italian Stuffed Steak Rolls

Hammer the meat! Then mix up the bread crumb and parmesan filling and make the sauce!

Italian Stuffed Steak Rolls
 
At this point you're ready stuff and roll! Just put a little filling onto the beef slices. I used about two tablespoons per slice based on the size of my steaks...
 
Italian Stuffed Steak Rolls 

Carefully roll up the beef and tie the rolls with string. Don't they look fancy?! 
 
Italian Stuffed Steak Rolls
 
Once all of the beef rolls are finished, it's time to brown them in a little olive oil... 
 
Italian Stuffed Steak Rolls
Once browned, add the tomato sauce to the pot. Lower the heat and simmer for 1 1/2 hours...
 
Italian Stuffed Steak Rolls

They should be quite tender by then. Serve them over buttered spaghetti noodles with a little sauce on top. Don't forget to cut the strings off before serving!!

Click Here for Printable Version!

Italian Stuffed Steak Rolls

Italian Stuffed Steak Rolls

1 1/2 pounds of round steak sliced into 1/4 inch thin steaks 
1 cup fresh bread crumbs
1/4 cup chopped onion
1/4 cup chopped parsley
1/4 cup grated Parmesan cheese
3 tablespoons olive oil
1  6oz can tomato paste
2 cups hot water
1 clove of garlic, minced
1 1/2 teaspoons salt (I know this seems like a lot, but the sauce needs it)
1/4 teaspoon pepper (or to taste)
Basil or Italian seasonings to taste

You may need to trim the round steaks if they're too large. I like them around 3 to 4 inches long when rolled.
1. Season both sides of the meat with salt and pepper to taste.
 
2. Place one slice of meat at a time between two pieces of plastic wrap. Pound thin with a meat mallet or rolling pin.
 
3. Mix the bread crumbs, onion, parsley and Parmesan cheese together to make the filling.
 
4. Make the sauce: Mix the tomato paste, hot water, minced garlic, salt and pepper together in a bowl. Mix well to break up the tomato paste.
 
5. Spread filling over the beef slices. Two tablespoons or so, depending on the size of your beef slices.
 
6. Starting at one end, roll the beef tightly enough to enclose the filling inside of the roll. Tie with string to secure. 
 
7. Heat the olive oil on medium heat. Add the beef rolls and brown on all sides. You can do this in batches if they all don't fit in the pan at one time.
 
8. When the beef rolls are browned, pour the tomato sauce over the rolls and lower the heat to a simmer. Cover and simmer for 1 1/2 hours.
 
We like these served over buttered noodles with a little of the sauce on top.

Let me know how you like it, or if you made any changes that worked for you. 


Thursday, August 18, 2016

Revamped Vintage Bag

Whenever I visit thrift stores I keep an eye out for vintage bags with decent hardware. I take the bag apart and use it as a patter to fashion a new one (I'll do a tutorial on this the next time I make one). This is my latest:
 
 
I machine embroidered the sweet floral design on the front, then used it as the body of the bag.


The interior is lined with a cute yellow and pink flowered cotton.

 
I love how it turned out! It's available in the shop. :)

Monday, January 4, 2016

Finally Finished....

It's now officially 4 days into 2016. I love the fresh start of the new year!! It means that I've survived another crazy Christmas season. The decorations are put away, the tree is down and the mess is cleaned up. HURRAY!!
 
It's also nice to have this project behind me....
 

I was able to finish the Softball tee shirt quilt in time for Christmas. The woman who commissioned me to make this quilt wanted to give it to her husband as a gift, so I needed to get it finished. I stitched late into the night for a couple of weeks and was able to finish by Thanksgiving. This was a good thing, because I had a lot more Christmas sewing to do!!!

Detail~

I wasn't sure how this quilt would turn out in the end. It kept revealing itself to me as we went along. I focused on the tee shirt scraps that I wanted to include. Then, I built up the smaller tee shirt pieces with other scraps of fabric so that I could line everything up to make the rectangular shape of the quilt.

More detail~

In the end, I'm very happy with how this quilt turned out...and the client was thrilled with it! :)

Monday, August 31, 2015

Tee Shirt Quilt

I'm working on a tee shirt quilt. This is the first time I've been asked to make one. This one is for a guy who plays softball with a senior league. A box of shirts arrived last week and I dug right into them. Most of them were white with emblems of various sizes.

I have to admit that I found this task a bit daunting until I found this tutorial over at Happy Quilting: http://www.happyquiltingmelissa.com/2013/08/t-shirt-memory-quilt-tutorial-and.html

I love the way she simply kept adding scraps of fabrics and then squaring as she went. I'm finding this technique works really well for such odd sized pieces of tee shirts.

I have two cats so I can't leave the pieces on the floor. I'm using masking tape to attach them to a large wall in my sewing room. I like that I can get a good look at how things are coming along and I can move things around.


(BTW - that lower corner is completely changed. I wasn't loving those prints/colors there...but you've got to start somewhere).

Making a quilt for an older man is tricky because I don't want the finished product to be too juvenile. Plus, I'm limited as to the fabrics I can use because I don't want it to look to feminine. I'm using a lot of plaids with some other misc. fabric scraps mixed in. I'm also throwing in some hand embroidery where I can..


I'll keep plugging away and hopefully finish with the blocks shortly. I'm planning to machine quit it using the "quilt as you go" method on each block. Then, I'll hand sew the blocks together. After that, I'll add a boarder. Baseballs in each corner and bats along each edges I think...unless I change my mind.

Sunday, August 2, 2015

The County Fair!

There are so many things I love about summer time. Homemade ice cream, warm weather, not having to bundle up to go outside, summer fruits...and of course the fair!

The county fair is a yearly excuse to eat all of the junk food I can take in. I also enjoy seeing what creative people have been up to in the "home arts" exhibits. There was an amazing display of quilts..
 

How I missed getting a picture of the quilt that won the grand prize is beyond me. Too much excitement I guess. It was a beautiful appliqued floral design. I've decided that I'm going to enter a quilt next year. Maybe I'll win a ribbon!?!

Look at this adorable goat wool rug..!


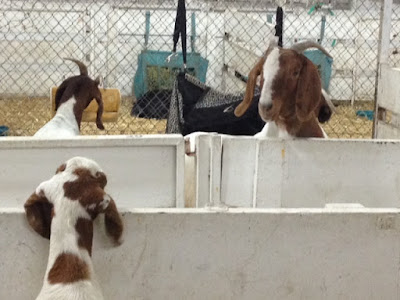
And then there's the livestock. So many gorgeous animals to look at. Plus, it's fun to talk with the young 4-H kids there about their animals. They're so sweet and friendly...and they can teach you a lot!

With the day beginning to wind down the goats were able to socialize amongst themselves. I think they're checking in with each other about how the day went...


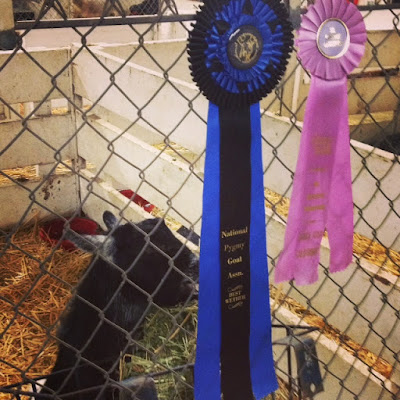
Ahh...we have a winner!!


This sweet baby calf was hungry, but luckily her mamma was right there with her..


I don't know what I enjoy more...the greasy fried snacks, the fiber arts or the animals. Luckily I don't have to choose.

Saturday, August 1, 2015

Vintage Crochet Baby Socks...

I picked up this pair of vintage baby socks around two years ago. I had know idea what I was going to do with them, but I knew I needed to have them for a future project.

I finally decided on an applique design with tiny little hexies on the second sock. Now all I need to do is come up with a way to frame them..


Thursday, July 30, 2015

Repurpose an Old Drawer into a Puppet Theater for the Kids!

I had a few spare minutes today so I popped into a vintage/junk shop that I frequent in Healdsburg, CA. I spotted this adorable puppet theater that had been made from a drawer. Isn't it cute??


I'm going to start keeping my eye out for an old drawer so I can make one for the little kids when they come to visit. This would be simple to make. All you'd need to do is cut out the window, paint it and add a curtain to the inside. The curtain is just gathered onto a piece of wire and hung in the upper inside of the drawer. Adorable!!